Settings
Start here. Add your Google Maps API key and configure the map so the preview loads correctly.
Google Maps API Key
Paste your Google Maps API key to enable map tiles and geocoding.
Basic Map Configuration
Set default map type, controls, and interaction preferences.
Default Zoom
Choose the zoom level shown when the map loads.
Map Style
Apply a custom style to match your storefront branding.
Map Preview
Once the API key and settings are valid, the preview displays the live map so you can confirm styling and zoom.
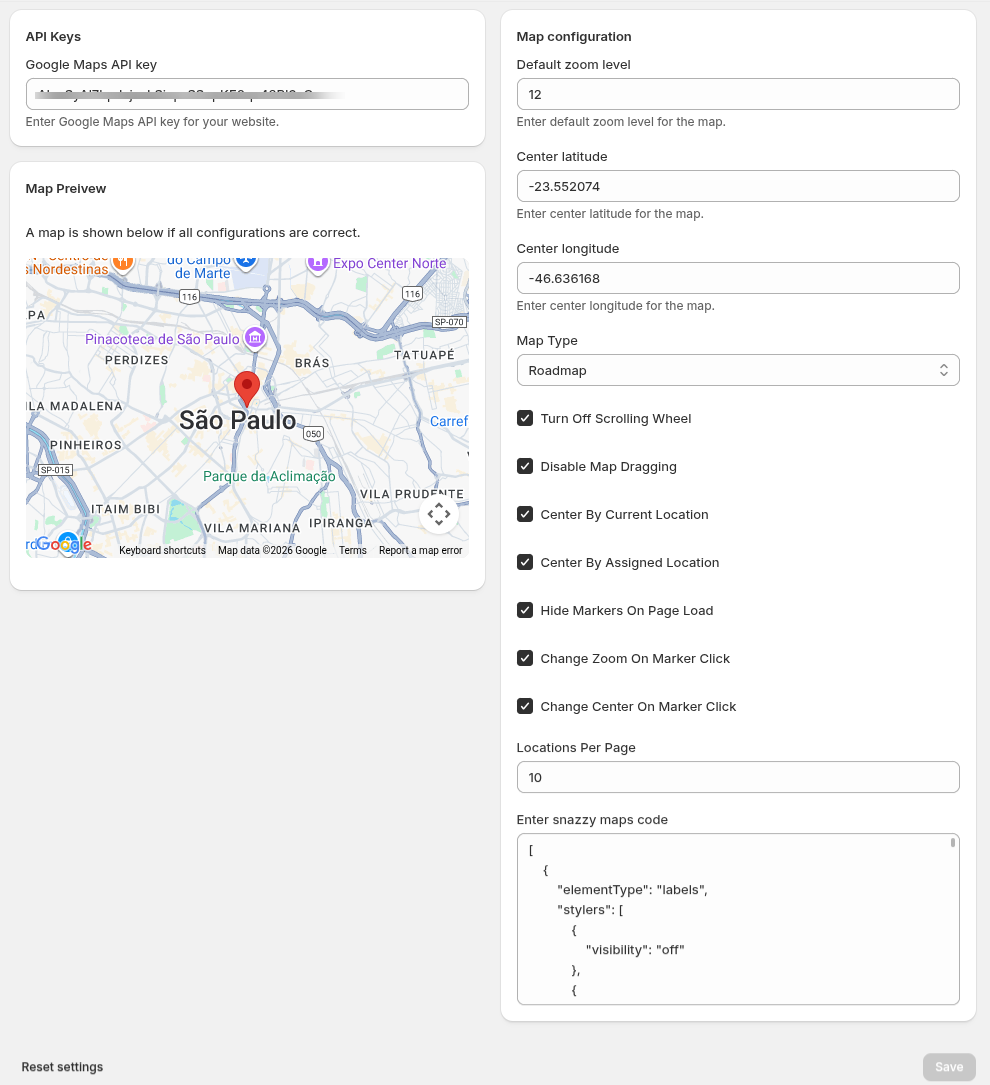 Settings page with API key configuration and live map preview.
Add Category
Create categories so every group of locations shares a marker icon on the map.
Name
The category title shown in filters and location cards.
Description
A short summary to explain when this category should be used.
Marker
Select the marker icon that appears on the map for this category.
All locations assigned to this category will display the selected marker icon.
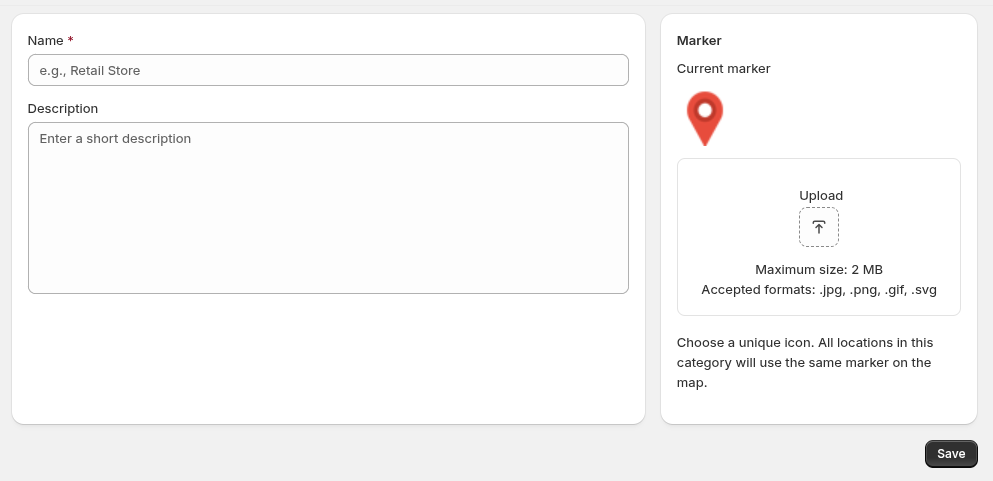 Add Category form with marker selection.
Manage Categories
Update or remove categories and support bulk deletion when cleaning up old entries.
- Edit category names, descriptions, or marker icons.
- Select multiple categories and use bulk delete to remove them at once.
- Confirm that any locations still have a valid category after deletion.
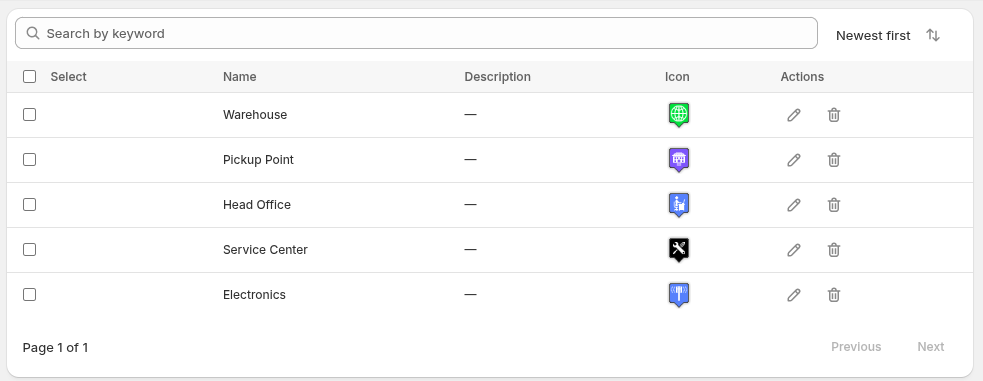 Manage Categories table with bulk actions.
Add Location
Add each store or pickup point that should appear on the map. Assign one or more categories.
Title
The public-facing store name shown in the locator list.
Description
Optional details like services, notes, or location highlights.
Phone
Primary contact number for customers.
Email
Contact email displayed on the location card.
Website
Website or landing page URL for this location.
Store Timing
Set opening and closing times for Monday through Sunday, or mark a day as closed.
Assign Categories
Select one or multiple categories that apply to this location.
Address
Street address shown to customers and used for map pins.
Latitude
Latitude coordinate for precise pin placement.
Longitude
Longitude coordinate for precise pin placement.
City
City name for filtering and search.
State
State or region name displayed in the location details.
Country
Country for international filtering and map accuracy.
Zip Code
Postal code used for nearby searches.
Store Image
Upload a storefront or brand image to show in the location card.
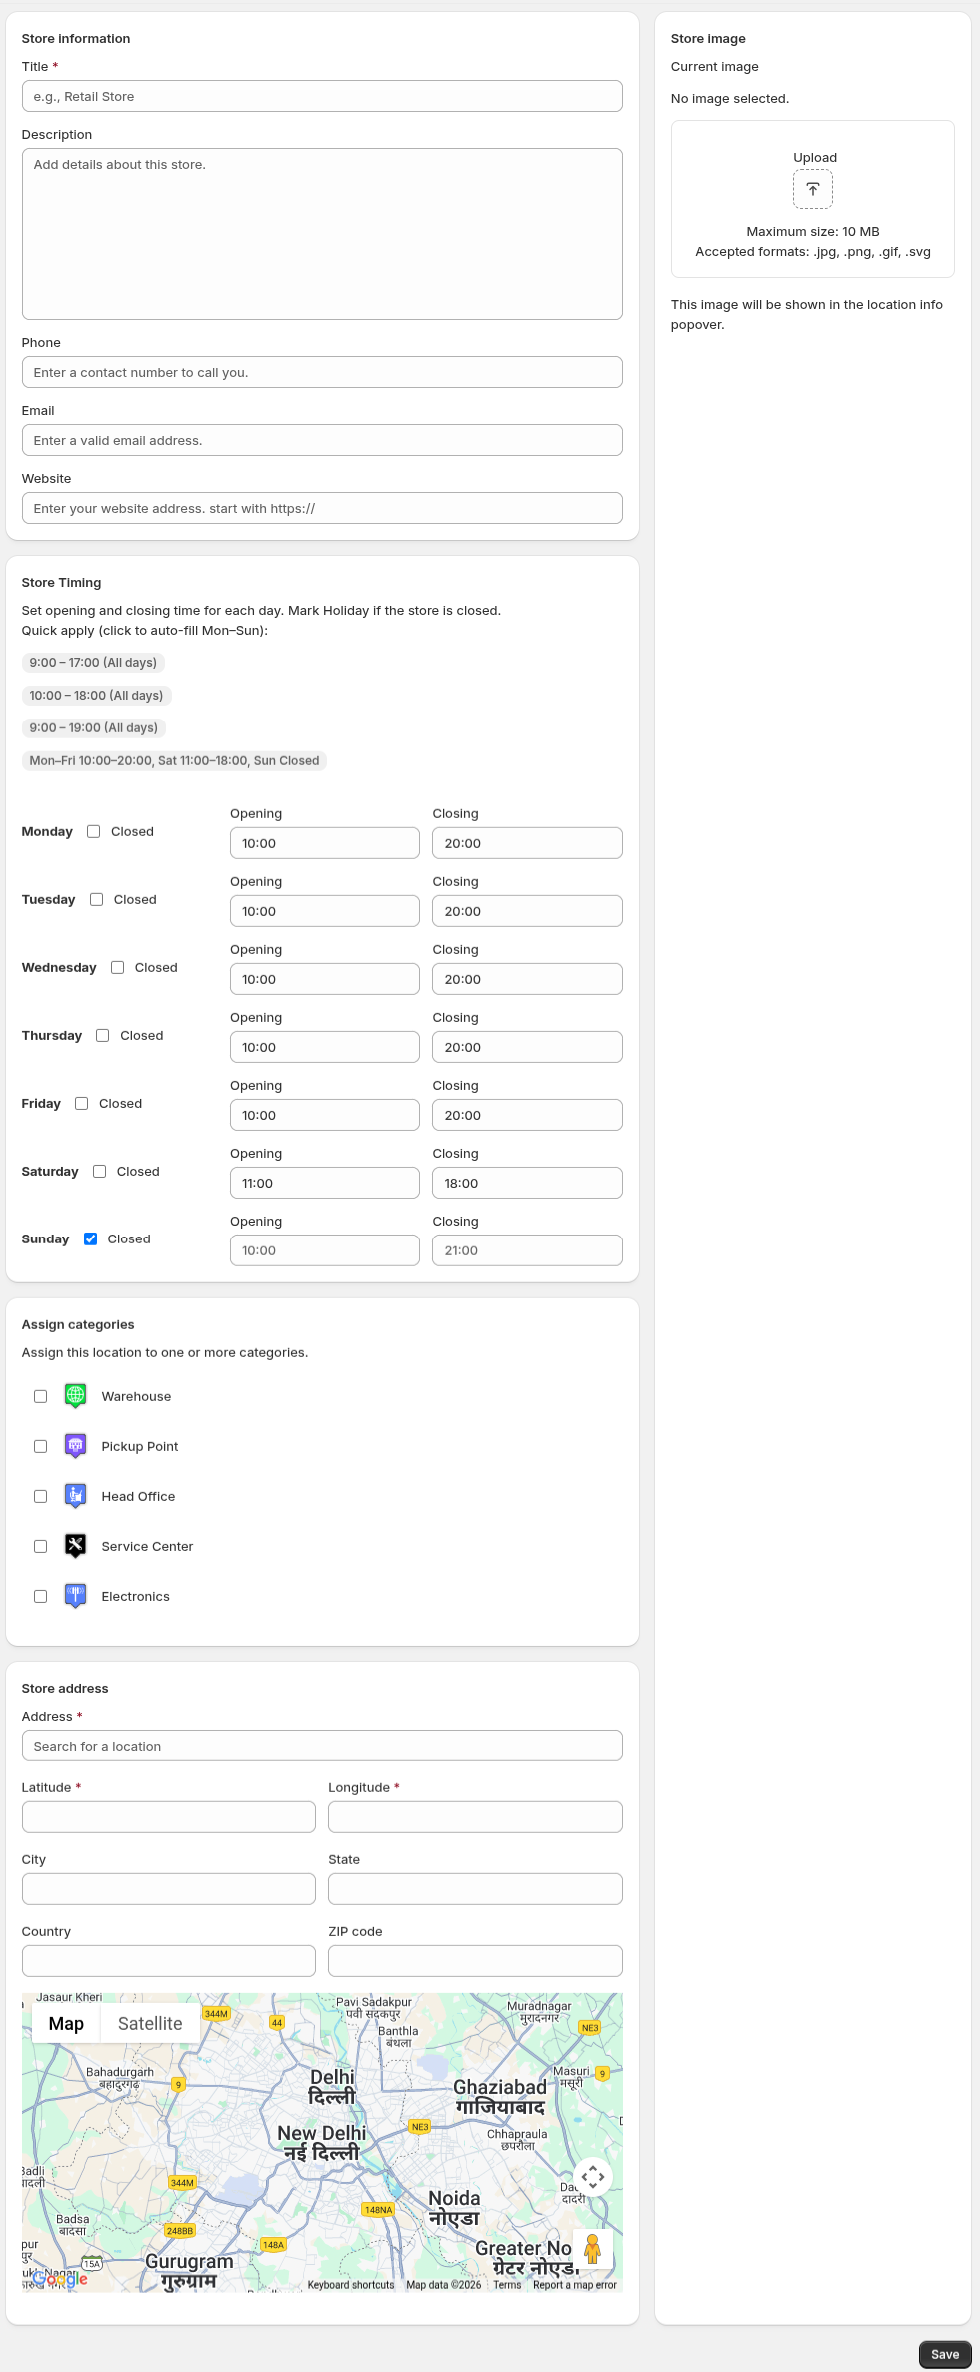 Add Location form with timings and category assignment.
Manage Locations
Keep your store list accurate by editing or deleting existing locations.
- Edit any location details such as address, timings, or categories.
- Delete inactive locations to avoid sending shoppers to closed stores.
- Verify map pins after major updates.
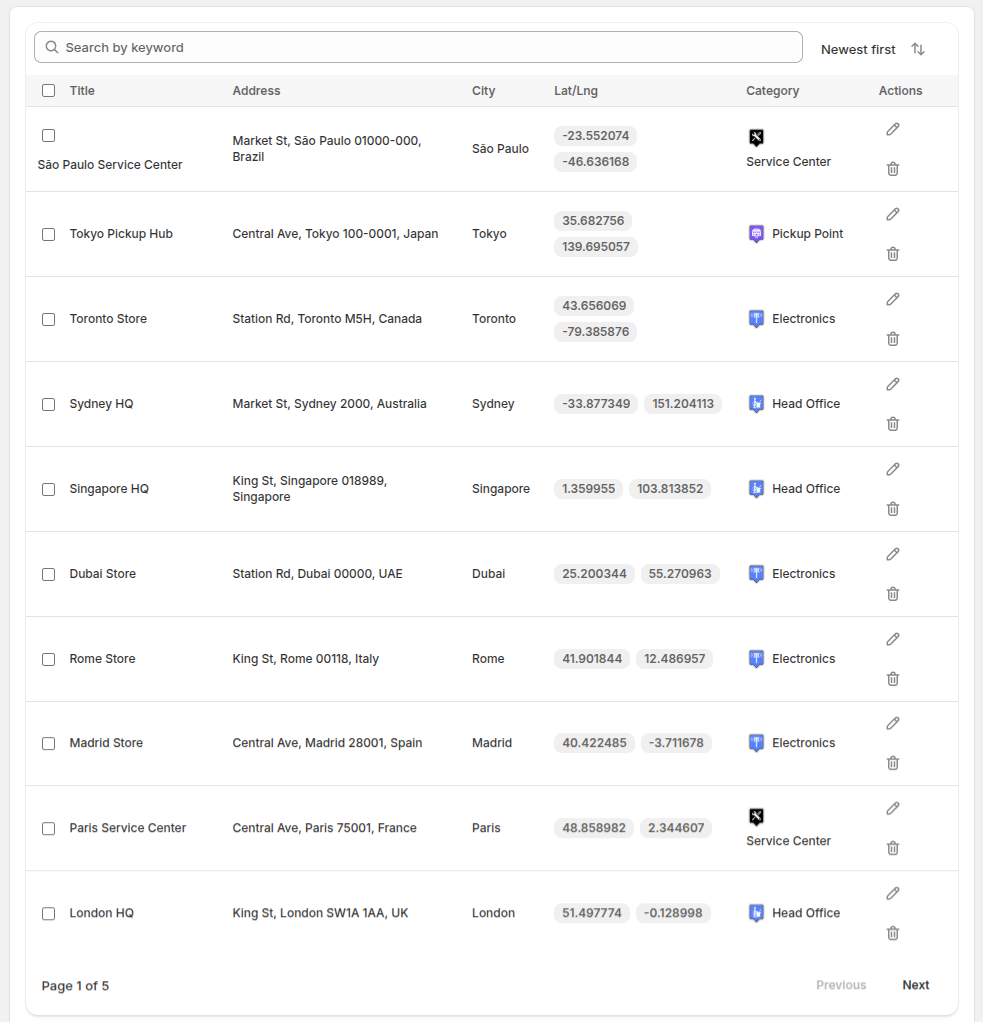 Manage Locations table with edit and delete actions.
Import Locations
Bulk upload locations using CSV. Preview the data before publishing everything live.
- Download the sample CSV to match the required format.
- Upload your CSV file to stage the import.
- Review the preview table for errors or missing fields.
- Submit to import all valid locations.
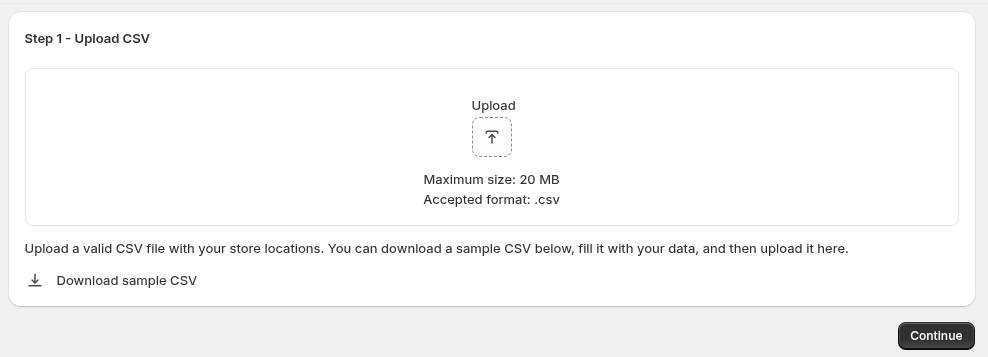 Import page with CSV upload and preview table.
Show Map on Shopify
Add the Store Locator Plus block to a Shopify page so the map appears on your storefront.
- Open your Shopify page in the theme editor.
- Click “Add section” on the page layout.
- Select “Apps”, then choose the “Store Locator Plus” block.
- Save and publish the page to make the locator live.
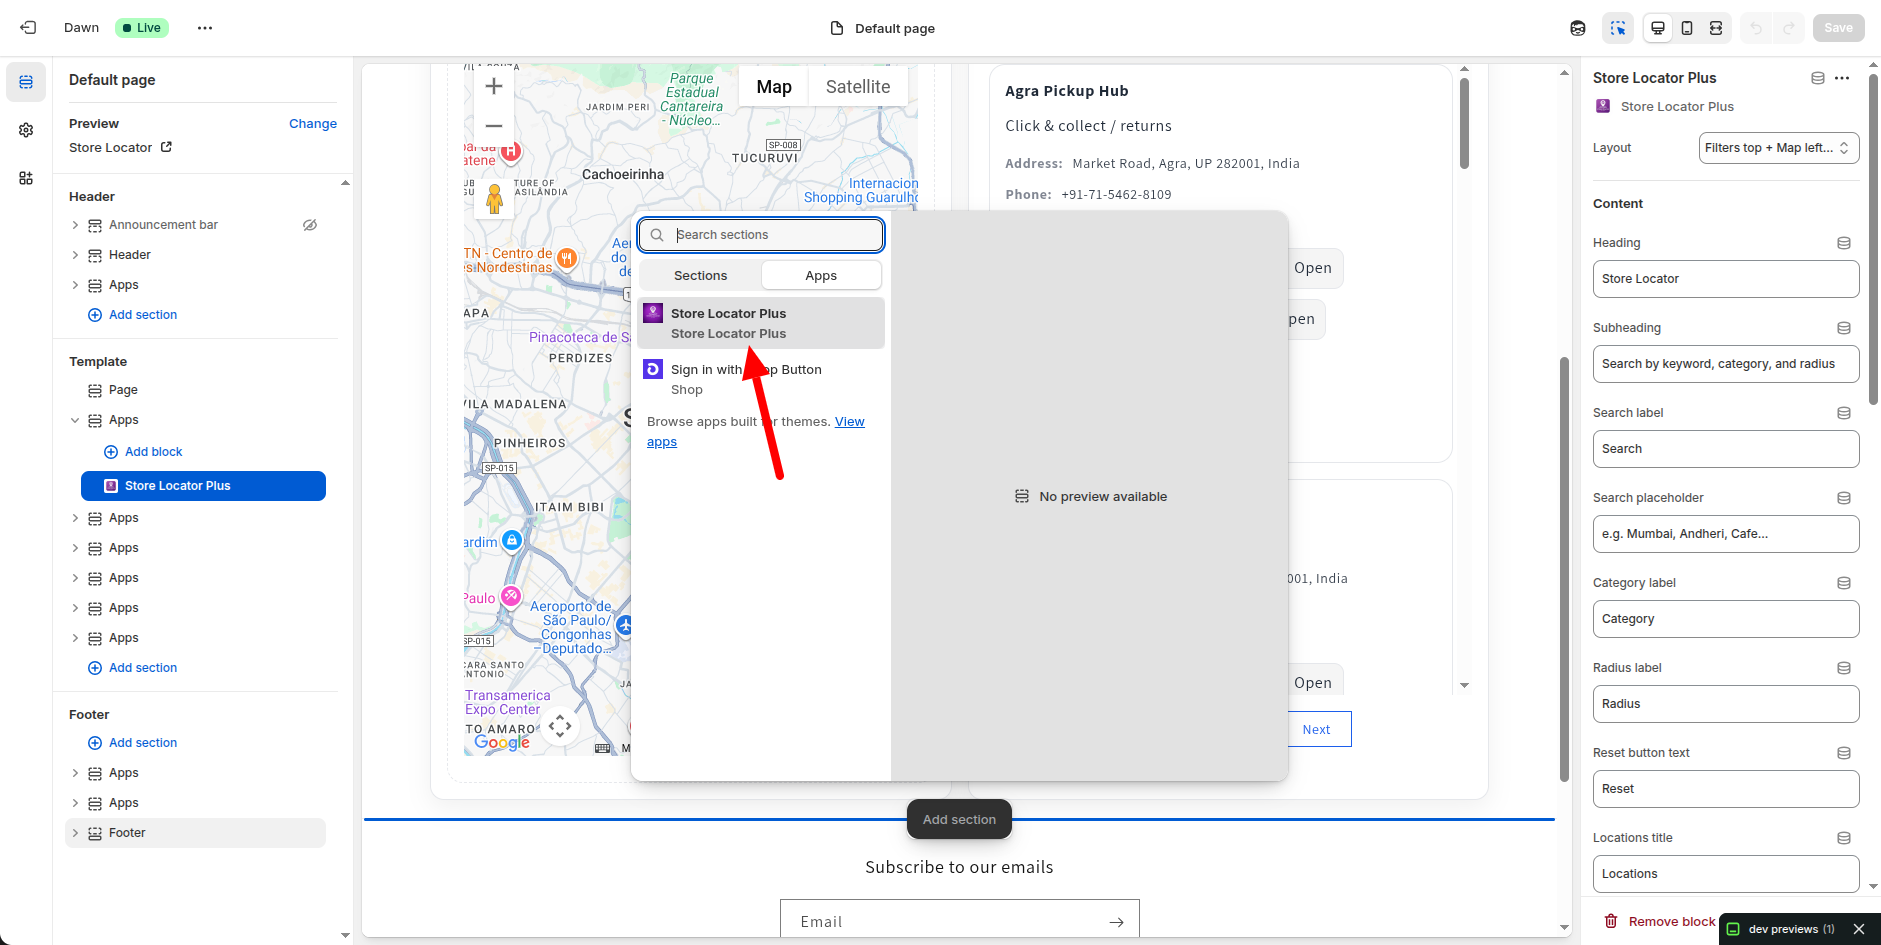 Shopify page preview showing the Store Locator Plus map block.